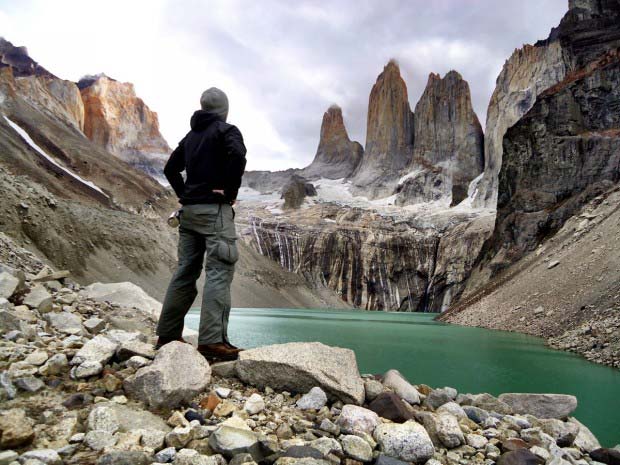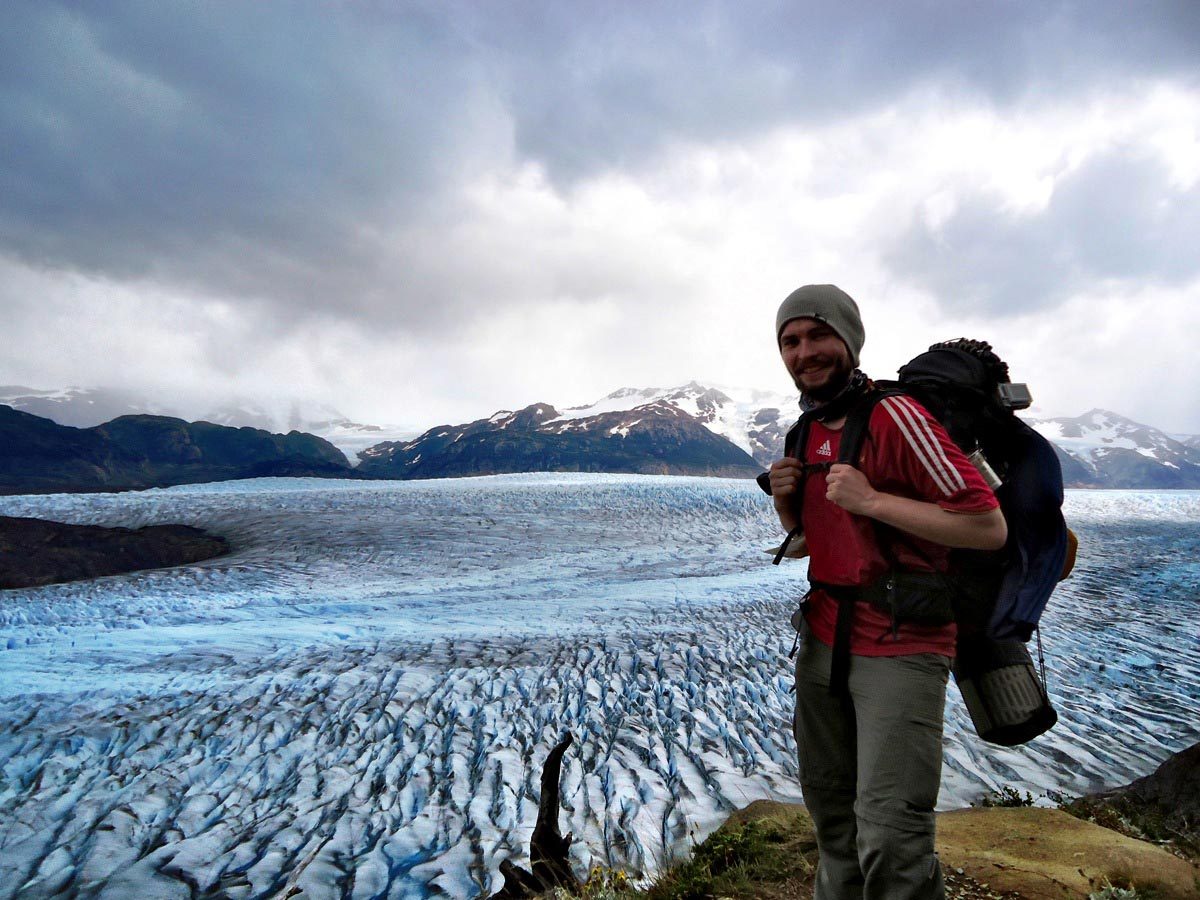
Here you'll find all info needed on how to prepare for hiking in Torres del Paine in Patagonia, Chile. Even the Lonely Planet considers the trails here as some of the worlds best trekking routes. I hiked the “Q” in 2013 and did the circuit again in 2016, altogether I spent 3 weeks in the park. (Completely updated: October 2019)
 Download my Torres del Paine Trekking guide!
I published all information needed to plan your trip to Chile in one clear and concise guide book based on my experience. This book includes travel guides for each region of Chile with a strong focus on Patagonia and is designed to save you a lot of time & will make your trip much easier!
Before packing make sure you have a good health & travel insurance. This article is part of a whole series of free guides for Backpacking in South America.
[divider]
(Click to go to the related section)
2) Bus to Torres del Paine / Transportation
3) Camping in Torres del Paine & Refugios
4) Weather, Clothes & Insurance
5) Which food to take?
6) Costs to calculate
8) Which camera gear to bring?
9) Videos of my experience
10) Where to sleep in Puerto Natales
11) Where to stay inside the park
12) Guided Trekking Tours
[divider]
1) Backpack & Gear
Camping is the cheapest option and I highly recommend going for this if you want the best experience (see (3) for Campsites and other options) – therefore you should bring:
a) Tent
Should be lightweight, spacious and should have aluminium poles due to the strong winds. I found the MSR tents to be very recommendable – I went with a “Hubba” and met many fellow hikers using MSR tents who were very happy with their choice, too!
b) Trekking Backpack
I recommend using a comfy hiking backpack with options to attach tent and mat – use a bigger one for the longer itineraries like the circuit or ‘Q'
>> find everything you need in the Patagonia Packing list!
What should I do with my luggage?
No worries! Almost all hotels and hostels in Puerto Natales offer the possibility to store the luggage you don't need for the trek. Of course it would be nice to also stay with them after your trek – this way you also return to a place which you are already familiar with (check my recommendation at 10).
Consider: I used 1,5 gas cans for 7 days (breakfast & dinner) for myself only. I didn't use trekking poles at all but would recommend buying some lightweight ones for the steeper parts as they give you more stability, especially when walking downhill (I was fortunate to use one from my friends for the hairy parts of the circuit!).
[divider]
2) Bus to Torres del Paine / Transportation inside
The standard starting point for the park is usually the small town named Puerto Natales in Chile. Situated 112 km south of the National Park it offers regular transfers with Buses who depart from the bus terminal.
Get in
Nearly every hostel in Puerto Natales sells return tickets, but prices can vary between 15.000 (22 USD, directly at the office of the bus company inside the bus terminal) and 18.000 CLP (at the hostel). By buying a return ticket you can leave the date of return open so you can extend or shorten your stay in the park as you wish. Buses leave Puerto Natales at 7:30 a.m. and 2:30 p.m. and will need 2-2,5 hrs to arrive at the park entrance (Laguna Amarga).
Beside the entrance there are 2 more stops afterwards in the park: Pudeto (30-45 mins later), where you can catch the boat to Paine Grande (see below) and the Administration about 2 hours later.
Bus companies who offer daily services are: Buses Gomez, Buses Fernandez, Buses Maria José and Bus Sur (offers also a connection from Punta Arenas)
Get around
Inside the park you can take a boat which connects Pudeto and the campsite / refugio Paine Grande. The catamaran will cost you 35 US$ one way. During high season the boat leaves from Pudeto 09:00 a.m., 11:00 a.m., 2:00 p.m., 4:15 p.m. and 6:00 p.m. and will take around 30 minutes – the other way it leaves at 09:30 a.m., 11:30 a.m., 2.30 p.m., 5:00 p.m. (bus connection) and 6:30 p.m. (bus connection).
For more info and updated schedules check the certain catamaran info page.
Another option inside the park is to take a minishuttle between the entrance and the Hotel Las Torres. When arriving at the park you just go there, hop on and pay 2.800 CLP (= 4 € / 5 USD). It takes just a few minutes. For the way back it leaves around 30-45 mins before the bus to Puerto Natales arrives at the entrance.
The 3rd option is a rather expensive one where you'd need additional transport inside the park to get to the Lago Grey Pier. From here you can take a boat to Refugio Grey for about 50000 CLP (= 64 € / 72 USD) one way. The same is possible vice versa, for both options you should book in advance. The whole service is offered by the Hotel Lago Grey so it makes sense to stay there if you want to do this.
Get out
You have again two times at the same bus stops. The early bus leaves from the Administration at 1 p.m., from Pudeto at 1:30 p.m. and from the entrance at 2:30 p.m.
The late bus leaves from the Administration at 6 p.m., from Pudeto at 7 p.m. and from the entrance (Laguna Amarga) at 7:45 p.m.
[divider]
3) Camping in Torres del Paine & Refugios

I recommend using your own tent / renting a tent in Puerto Natales and camp at the campsites.
Consider: cooking is only allowed in campsites / refugios, open fire is not allowed anywhere in the park (smoking is only allowed at the cooking shelters!). The same goes for camping in general.
Refugios & Domes
A bed will be around 35-170 USD in a dorm and you have to pay extra for breakfast (around 14 USD) and sheets or bring a sleeping bag. The refugios are operated by two different companies and you need to book everything in advance especially in the high season.
The main refugios offer a range of services beside accommodation such as tent rental, meals (both to be booked in advance!), kiosks, electricity, some even have a bar and (expensive, slow) WiFi.
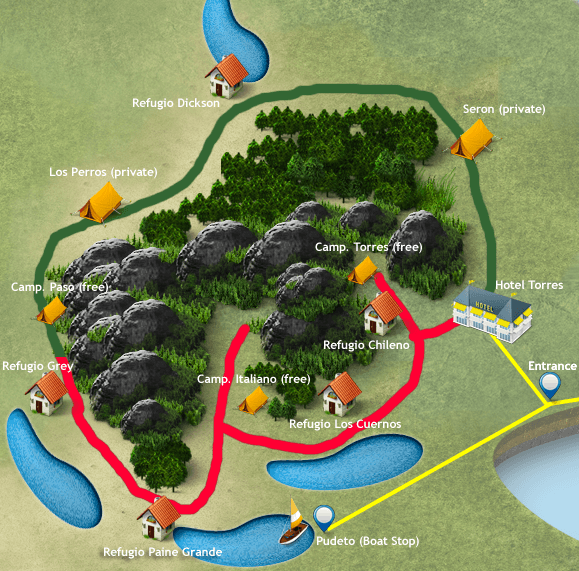
Refugios/Dome Tents operated by fantastico sur: Los Cuernos, El Chileno, Torres (next to Hotel Las Torres), El Frances, Seron.
Refugios operated by Vertice Patagonia: Dickson, Paine Grande, Grey
Free Campsites
Wohoo – free accommodation! Yeah that sounds good, huh? Unfortunately there are just a few and some of them might be closed. So: if you want to do one of the big treks you have to stay at paid campsites in between. The setup for a free camp is always the same: you have a rain-covered construction to cook at, places to set up your tent, toilets and water (mostly from a stream).
Please head to the official reservation system to reserve your spot at the free CONAF campsites in advance. (For now the instruction page is available in Spanish only, but you can change the language settings once you are in the reservation process). Please consider that you can stay for one night only. Reservations are mandatory.
The free campsites are:
– Campamento Torres (closed for season 2017-2018-2019-2020!!)
– Campamento Paso
– Campamento Las Carretas
– Campamento Italiano
You'll find also Britanico and Japones but they are for climbers with a certain license only.
Consider: you always have to take your garbage with you and you should wash dishes away from the stream. I highly encourage you to take this seriously and talk to fellow campers who don't respect the rules to protect the environment!
Paid Campsites
There are two kinds of paid campsites – the private campsites and the ones next to a refugio. The prices vary, usually the ones next to a refugio are more expensive. The difference between both are the facilities you can find: private campsites offer a place to cook, toilets, showers and water as well as a small shop. At the refugios you have the possibility of using the restaurant, a minimarket and sometimes you have plugs to charge the batteries of your camera.
Moreover you'll have the chance to rent tents, sleeping bags and even mats. The paid campsites are also operated by fantastico sur and Vertice Patagonia.
Important: During the last few years the visitor numbers to the park increased strongly. Therefore you need to reserve each campsite well in advance for the exact day you want to stay there. You can do so on the website of the companies. Fantastico Sur raised their prices dramatically and only offers platform camping with fullboard options for Los Cuernos & Chileno (try to avoid by using Francés and Torre Central). If you're late to the party your only chance is to book a guided trek, as those have reserved spots for their dates. Another option is to do day tours and day hikes which I highlight in this article.
Here are all campsites with prices (Vertice) – all camps from Fantastico Sur have a set camping price which ranges from 16-21 USD, depending on the season (2P Tent, per Person):
– Refugio Paine Grande, Vertice (6500 CLP = 11 USD)
– Campamento Francés, Fantastico Sur [this is a new one, not marked in my trail map; located between Los Cuernos and Italiano]
– Refugio Los Cuernos, Fantastico Sur
– Refugio Chileno, Fantastico Sur
– Campamento Serón, Fantastico Sur
– Refugio Dickson, Vertice (5500 CLP = 9 USD)
– Campamento Los Perros, CONAF/Vertice (5500 CLP = 9 USD)
– Refugio Grey, Vertice (5500 CLP = 9 USD)
– Campamento Torres/Central, Fantastico Sur [next to Hotel Las Torres]
[divider]
4) Weather, Clothes & Insurance
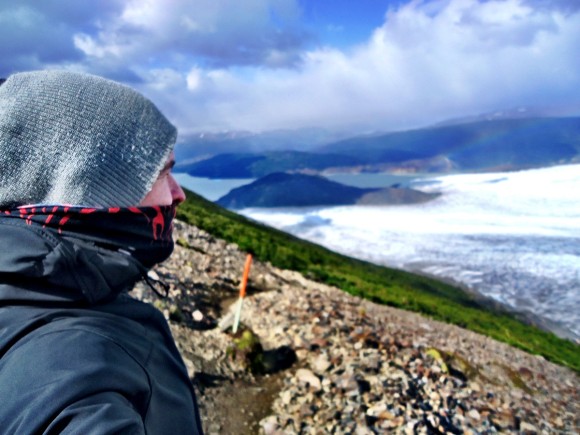
First of all: in Patagonia you can have basically everything in one day, this means: snow, rain and sun. You'll always have very strong winds to deal with, this means: up to more than 100 km/h. Speaking for the summer season you should be prepared to temperatures until below 0°C. In winter it can be quite cold. I personally recommend to hike during the shoulder season October/November and March/April to avoid the crowds (depending on the exact date you might also not need to book camp sites in advance).
The high season in Torres del Paine lasts from 1st of October to 30th of April, the low season from 1st of May to 30th of September. Though the park is open all year round most trails, camp sites and refugios are closed in winter (May-August). If you still want to hike in winter you need to get in touch with CONAF, come well prepared and consider going with a guide as trails are hard to find after snowfall (there is no maintenance during that time of year).
It's always best to check the weather before you go even though the forecast is not reliable and weather can change quite quick. So: better be prepared for everything. Even in summer I recommend to take a jumper for the colder parts of the trek like the John Gardner Pass. In Winter you should add layers of warm clothes.
Speaking about clothes:
>> find everything in the Patagonia Packing list!
I found the following items most valuable given the harsh conditions in Patagonia:
- 1x good, waterproof Hiking Boots –
- 2 x Hiking Pants, with the option to turn into a short pant (winter: choose a thicker one)
- 1 x Fleece Jacket – highly recommended for every season!
- 1 x waterproof Jacket – my recommendation would be the bright orange one from Marmot to stick out in photos (winter: take a warm waterproof winter jacket or combine with a down jacket)
I also always advise on getting travel insurance as it is important to have you covered in case anything happens throughout your trip. I recommend the package offered by Safety Wing.
Consider: In February I used to trek with thermal shirt and long pants all the time – when it rained i kept walking (during summer season I recommend bringing a good rain jacket as well as a fleece jacket for the camps). Furthermore I had two of each, this means: walking clothes and dry clothes for the camps – i never mixed it to have always a set of dry clothes in my bag.
[divider]
5) Which food to take for hiking in Torres del Paine?
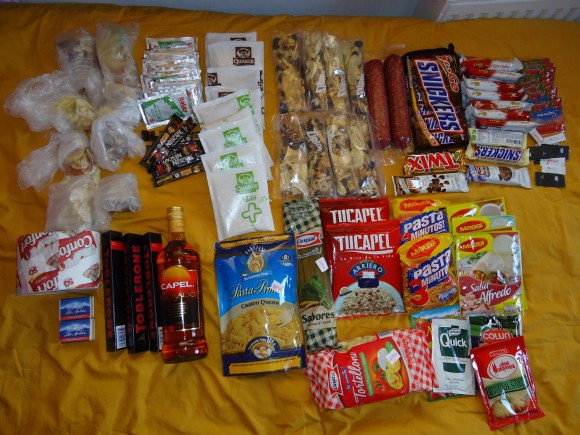
When I have been on the trek I saw different kind of strategies – basically it's very individual what to take for a multi-day hike. As I planed for 9 full days my main focus was to pack as light as possible because food will be the heaviest part in your backpack in that case.
Therefore I stuck to (all packed into Zip-Lock bags):
– porridge & dry fruits for breakfast + tea / coffee
– salami, cereal bars, snickers, dry fruits & nuts for lunch (small snacks to eat while short breaks)
– 200g rice or 200g pasta for dinner + sauce (sauce powder or soup powder) + cheese/salami to add more flavour 😉
Moreover it's always nice to have some chocolate and sweeties to treat yourself, also a small amount of alcohol is not a bad idea for cold nights (i took 200ml of pisco – also cool to celebrate the finish of a steep trail).
The second great option I got to try on my recent hiking trip in 2016 is to take [CBC show=”n” country=”uk”]lightweight freeze dried meals[/CBC][CBC show=”y” country=”uk”]lightweight freeze dried meals[/CBC]. Those meals are easy to prepare, they don't take much space and they taste actually not too bad. If you want to go for this option you should definitely buy it at home or online and take it to Chile with you (make sure ingredients are in line with the strict import regulations)!
Tip:
I was drinking the water from the streams – you'll have a stream nearly every 20 minutes when hiking. I simply used my cup to drink the water which has the best quality one can find.
At the campsites and the busier parts of the park you should be careful, go a bit up the stream and consider purifying using a SteriPen to ensure to drink clean water (there are some stupid people washing there dishes in the water which is strictly forbidden and led to problems with water quality in 2016 where several hikers got sick!).
So: just take a small bottle with you for the time in between and to purify water when needed.

6) Costs to calculate (Entrance & Shops)
As mentioned in the beginning the Torres del Paine is stunning and therefore very popular and it knows it – apart from the costs already mentioned for campsites and transportation you should calculate the following as well:
– entrance fee is 21.000 CLP (= 30 USD) for foreigners (children pay 6.000, Chileans pay 6.000 CLP)
– sweeties (M&Ms, chocolate bars) at mini-shops in refugios are between 1.000 – 2.000 CLPs
– soft drinks at mini-shops are between 1.500 and 2.500 CLPs
– beer is between 2.000 and 3.000 CLPs
[divider]
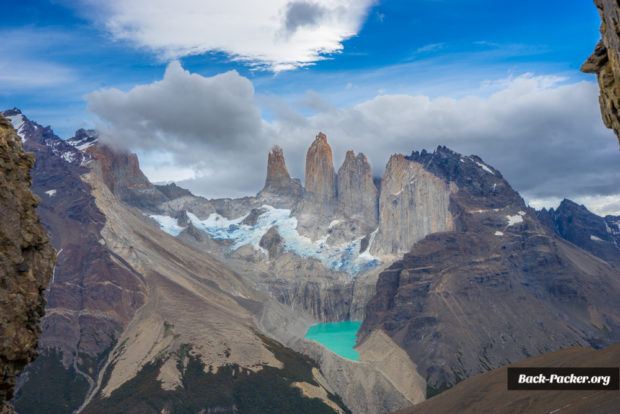
7) Hiking Routes Torres del Paine: the W, circuit, the Q
If you are still unsure which trek to do and you already have some hiking experience let me tell you: this park is absolutely worth staying for a longer time or doing a longer trek. If you are not short on time think about doing one of the big treks and maybe plan to do one of the more relaxed schedules you find below.
The advantages of doing the full circuit also known as the “O” are that you get to see some incredible landscape, you'll have much less people (the number is restricted to 80, reservation needs to be done in advance), you spend more time in the park and you get to know some great people as you'll meet your fellow hikers each day at the same camping sites.
my itineraries for you
- How to hike the W in Torres del Paine
- Trekking Guide: How to hike the Circuit in Torres del Paine
- The best day tours & day hike in Torres del Paine
Download my Chile Guide incl. TdP itineraries
Backpacking in Chile: my Chile Travel Guide
This is a clear and concise guide book based on my experience from 6 months traveling through Chile.
It includes travel guides for each region of Chile as well as a complete trekking guide for Torres del Paine, plus route itineraries. Checklists are included to help make sure you don’t forget anything.
This book is designed to save you a lot of time & make your trip much easier. Download it now or buy the paperback and take it with you!
more information >>
If you want to continue traveling through Patagonia you should also checkout the Argentinean part:
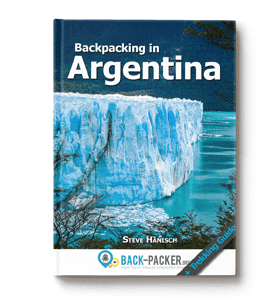 Backpacking in Argentina: my Argentina Travel Guide
This is a clear and concise 100 page eBook based on my experience from 3 months traveling through Argentina.
The book includes travel guides for the several regions of Argentina as well as a tiny trekking guide for El Chaltén and Ushuaia. Checklists are included to help make sure you don’t forget anything.
This eBook is designed to save you a lot of time & make your trip much easier. Download it now and take it with you!
more information >>
[CBC show=”n” country=”uk”][/CBC][CBC show=”y” country=”uk”][/CBC]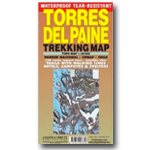 Torres del Paine Trekking Map (waterproof)
I used this map to prepare my itinerary in Torres del Paine, Chile. As it is a waterproof map it is also great to use it on the trek!
[CBC show=”n” country=”uk”][/CBC][CBC show=”y” country=”uk”][/CBC]buy it on Amazon >>
[CBC show=”n” country=”uk”][/CBC][CBC show=”y” country=”uk”][/CBC]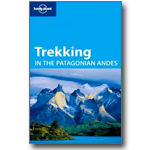 Trekking Patagonia, Lonely Planet
This is a must if you plan to hike a few times in Patagonia as this guide has itineraries for several parts of Patagonia and even for Tierra del Fuego. It's a good resource for the popular spots like Torres del Paine and Chaltén as well as the lesser known parts. Highly recommended!
[CBC show=”n” country=”uk”][/CBC][CBC show=”y” country=”uk”][/CBC]buy it on Amazon >>
[divider]
8) Which camera gear to bring?
It would be a shame to experience the park without taking pictures as the landscape is outstanding. Have a look at the video below and the photo essay from Torres del Paine to see the results.
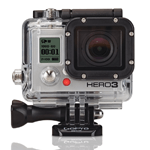 GoPro Hero
Since more than 3 years this little genius is my travel companion. Until today I produced more than 75 video episodes with the most versatile camera: it is robust, waterproof, small and easy to handle.
 Sony Alpha camera
If you want DSLR quality but don’t want to carry around a heavy DSLR you should get this Sony camera. I really love it as it is easy to handle and takes great photos without you needing to be a professional photographer. This compact interchangeable Lens camera costs less than a DSLR and fits easily in your pocket. If you want awesome photos from your trip to Torres del Paine you will be thankful for this investment later, for sure!
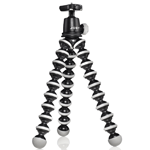 Gorillapod
Mini Tripod – since I’m using the Sony cameras I cannot imagine using it without this flexible travel tripod: small, handy and useful for night shots for both cameras mentioned above.
[divider]
9) Videos of hiking in Torres del Paine
In 2016 I revisited Torres del Paine and spent around 2 weeks inside the National Park: first I hiked the full circuit (which includes the “W”), next I stayed at the Hotel Las Torres inside the park for a few more days to explore the several day tour options.
My goal was to create a useful documentary to show which options you have exploring the park, what it is like to hike Torres del Paine and what you get to see when doing so. Enjoy!
[divider]
10) Where to sleep in Puerto Natales
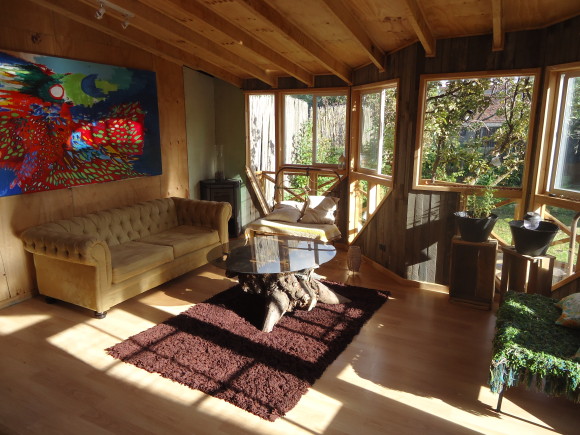
The eco hostel named Yagan House was my home for almost 2 weeks and is the perfect starting point for your hiking adventures. I liked the relaxed atmosphere and the cozy common areas – due to the interior it somehow felt more like a mountain lodge than a usual hostel.
Moreover the owner Paulina and her staff are very sympathetic and helpful: you can book bus tickets, organize other activities like kayaking or trips to El Calafate.
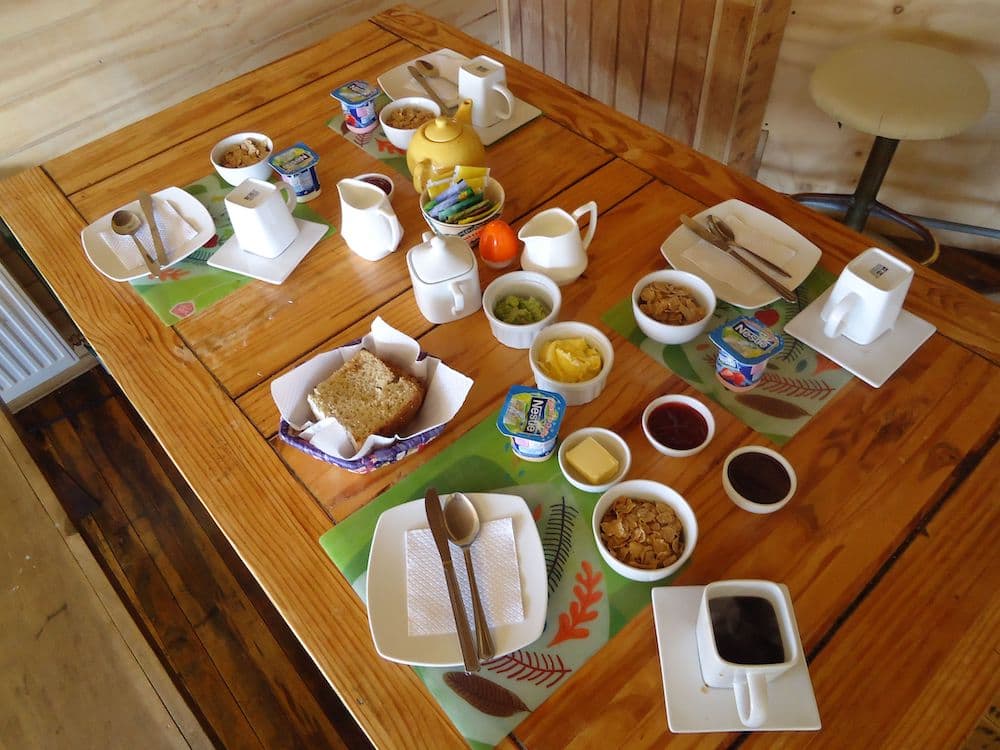
Also the breakfast was great: home made bread, yoghurt, cereals, butter, marmelade, freshly made scrambled eggs, tea and coffee are a good base for your first day of hiking in the park. On top of that you have a lot of extra services like a luggage room, laundry, rental of hiking equipment and a small housebar (beer, wine, pisco sour, hot chocolate, brownies).
Positive: there are 4 bathrooms so you never have to wait, great service, cozy atmosphere, luggage room for your time on the Trek, nice staff
Downsides: the Internet was sometimes very instabile (we had to restart the router quite often)
Prices: Dorm (4 Bed) from 10.000 CLP (= 15 € / 21 USD) , Private from 14.000 CLP (= 22 € / 30 USD)
Address: O'Higgins 584
Special Deal:
I can offer you a great give-away! If you use the discount code “holagringo yagan house” when checking in you get a free laundry per booking. A great chance to start on the trek with fresh clothes or get it clean afterwards while chilling in the cozy living room.
[divider]
Alternative Hotels & Hostels in Puerto Natales (Budget & Mid-range)
- Hostal Treehouse Patagonia – similar to the Yagan House this hostel offers privates as well as dorms in a very cozy, modern atmosphere.
- Toore Patagonia (***) – those of you who want more privacy should look into booking one of the comfortable, neatly designed bungalows at Toore Patagonia. Great deal!
- for more accommodation options including visitor reviews you should head to the Puerto Natales overview page of Hostelworld (Hostels, B&Bs) and make sure to check the Special Deals over at Booking (Hotels, Lodges)
[divider]
11) Where to stay inside the park
Do you want to add a bit of luxury to the end of your hike? Then this is a great option to not only spend more time inside the park but also to explore more and eat some great food!
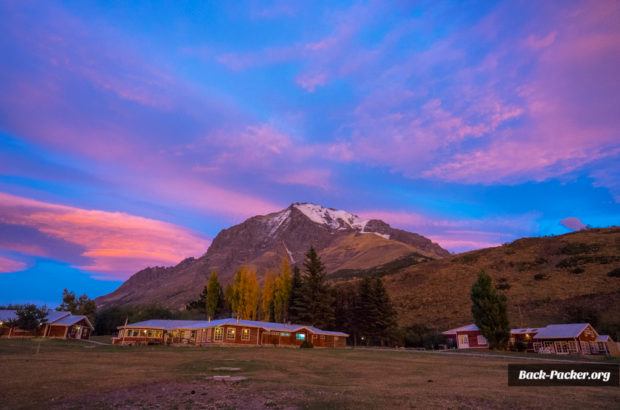
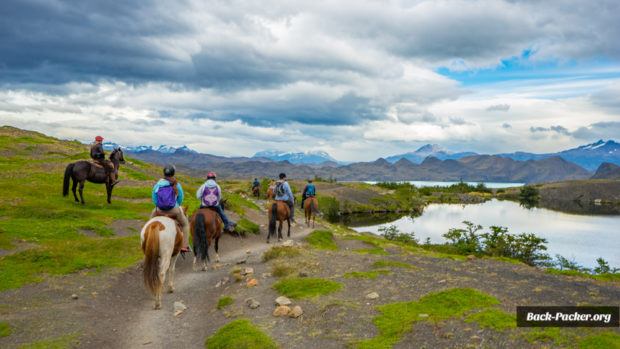
I got the chance to spend 4 days at Hotel Las Torres Patagonia in 2016 after I finished the circuit trek and used it to explore the spots you don't get to see when hiking. The fact that the area the hotel is located in is a private area owned by the hotel makes it possible to explore this part of the park on horses. My personal highlight was the rather tough horse riding/hiking combination up to the Cerro Paine which is opposite to the Torres and offers a unique view, a tour offered exclusively by the hotel (only 3 groups went up there in 2016!).
The Hotel itself is -hands down- definitely an upscale choice but offers the best location inside the park (perfect base for photographers), great tours and is a good choice for those who want to explore the park with day trips. Though a bit pricey the rooms are comfortable, the food and the bar are very good, also WiFi is included (but not as fast due to the location).
For those who finish the trip here but won't stay at the hotel: you are welcome to have a bite or a drink at the bar which has a lovely view to the Paine Massif before you leave!
other Hotels inside Torres del Paine (Mid-range & Luxury)
All Hotels listed here are pricey but offer great location and excellent services inside the National Park.
- Hotel Lago Grey (***) – located in the westernmost part of the the park the Hotel Lago Grey offers comfort paired with some great options to see the Grey glacier up close and explore some of the most incredible viewpoints in the area.
- Explora Patagonia (*****) – in terms of location and views this Hotel takes the cake as it is situated right next to the Lago Pehoé. Also here you have plenty of tour options to choose from which are mostly included in the room rates. You should get a drink before you checkout the prices though 😉
Ho(s)tels next to Torres del Paine (Budget & Mid-range)
The following options are located right next to the Serrano park entrance just before the Visitor center in Villa Serrano and are way more affordable.
- Vista al Paine Refugio – this solid B&B offers a range of private accommodation options as well as a dorm for those on a tighter budget.
- Pampa Hostel – this cozy, modern hostel offers beds in 4 bed dorms with shared bathroom facilities and has a great view to the mountains of Torres del Paine. A rich breakfast is included which makes it a pretty good deal!
- Konkashken Lodge – is one of the cheapest options in the area but still offers great value with its numerous cozy cabanas and its friendly owners who are there to help you. You can either stay in a private ore at one of the dormitories
[divider]
12) Guided Trekking Tours
Another option is to book a complete tour – this way you can leave the organization, gear rental, transportation, food and booking of campsites to local experts. Though you pay more you'll get the full package this way including porters and a knowledgable guide. Also here you need to be quick as tours sell fast – my tip would be to go for the circuit trail as your chances are higher to secure a spot (and it is the most awesome route anyway!)
After working with them in Africa (Kilimanjaro), South America (Peru) & Cuba I highly recommend the tours offered by G Adventures as their philosophy and focus on sustainable travel are in line with my personal values. With many years of expertise you can expect a well organized, fun trips in small groups with like-minded travelers:
- W-Trek with G Adventures – 6 day trek including meals, guide, camps, tents/hotel, transport and porters
- “O” Circuit-Trek with G Adventures – 11 day trek including meals, guide, camps, tents/hotel, transport and porters
- Hike Patagonia in depth – active 14 day tour covering the highlights of Patagonia, including the Torres del Paine W trek, El Chaltén (Fitz Roy, Cerro Torre) and El Calafate (Perito Moreno glacier) including meals, guide, camps & tents, hotels, transport and porters
- Patagonia & Tierra del Fuego – active 14 day tour covering the highlights of Patagonia, including the Torres del Paine W trek, El Chaltén (Fitz Roy, Cerro Torre), El Calafate (Perito Moreno glacier) and Ushuaia. This also includes meals, guide, camps & tents, hotels, transport and porters.
- Discover Patagonia (NatGeo Tour) – complete 14 day Patagonia & Tierra del Fuego tour covering all the highlights in the north (Bariloche, Puerto Varas), the south (Torres del Paine – day tour, Calafate, Chalten) and Ushuaia including exclusive National Geographic expeditions and talks.
[divider]
Helpful? Share this comprehensive guide via Pinterest!

Any tips for hiking in Torres del Paine to add?
If you have any tips or hints feel free to join the conversation – post a comment below and share your experience!
Moreover you can share this article with your friends on Twitter, Facebook or Google Plus by using the related buttons on the left.
[divider]
Disclosure:
My accommodation at the Hotel Las Torres was provided by the hotel due to the fact that I was filming an episode for my TV show and YouTube channel. Nevertheless I wasn't asked to write about my experience here but decided to include it as I liked it and wanted to share another option for those who want to explore more of the park.
All the content I provide from my travels is completely my own – this goes for opinions and views as well as for recommendations.